Silicone dip coating is a widely used technique for applying a durable, flexible silicone layer to various substrates. This article will walk you through the key steps of the silicone dip coating process, the advantages it offers, and the common issues that may arise, along with practical solutions to address them.

What is Silicone Dip Coating?
Silicone dip coating is a simple process that an object is dipped into liquid silicone, pulled out, and then dried or heated to form a solid, flexible layer. This protective coating boosts durability, grip, and resistance to heat and water. It’s a popular surface treatment widely used in medical tools, tool handles, and electronics, because it’s quick, affordable, and effective at improving product performance and longevity.
Silicone Dip Coating Process
Pre-treatment
Pre-treatment is important for proper adhesion of the silicone coating to the substrate. This step removes any contaminants that might affect adhesion and prepares the surface for the coating.
Common Pre-treatment Methods:
- Solvent Cleaning: Solvents are used to clean the surface and remove oils, dust, and other contaminants.
- Plasma Treatment: This process uses plasma to activate the surface, improving adhesion by altering the chemical properties of the material.
- Chemical Priming: Chemical primer is applied to enhance the bonding between the silicone coating and the substrate.
Proper pre-treatment is essential to achieve a uniform and durable coating.
Preparation of Dip Coating Solution
To prepare a dip coating solution, liquid silicone rubber (LSR) is mixed with solvents and additives to achieve the desired coating properties.
Key Considerations for Solution Preparation:
- Solvent Selection: Solvents like toluene or xylene are used to dissolve the silicone rubber and adjust its viscosity for uniform coating. The right solvent ensures proper application and drying.
- Additives: Various additives may be incorporated to enhance performance. These include curing agents to trigger crosslinking for curing, pigments for color, and fillers to modify the texture or mechanical properties of the coating.
- Viscosity and Stability Control: Controlling viscosity is critical for even coating. If the solution is too thick, it won’t coat properly. If it’s too thin, the coating may be weak. Stability is also important to prevent separation of ingredients over time.
By selecting the right components and controlling viscosity and stability, a high-quality dip coating solution can be achieved.
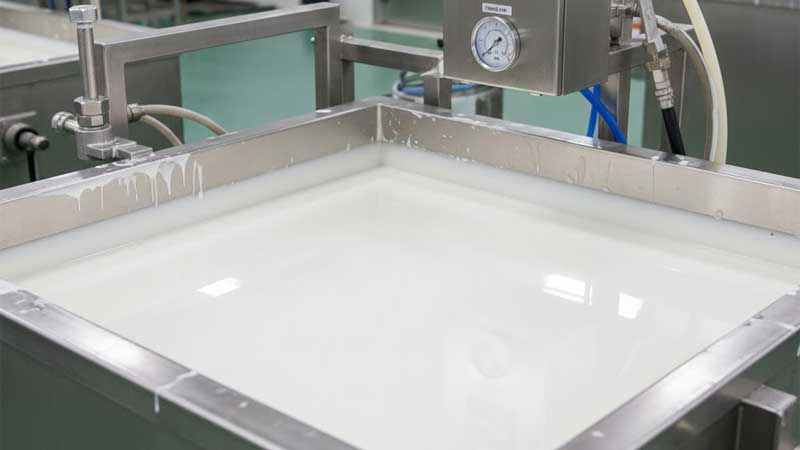
The Dipping Process
This is the step of dipping the substrate into the silicone solution to form the coating.
Steps in the Dipping Process:
Immersion: The substrate is dipped into the silicone solution at a controlled speed. The speed impacts how evenly the coating is applied.
Dwell Time: The substrate’s submerged time in the coating solution affects the coating’s thickness. Longer dwell times typically result in thicker coatings.
Withdrawal: The substrate is slowly pulled out of the silicone solution at a specific rate. The speed of withdrawal is important because it determines the uniformity and thickness of the coating. Too fast or too slow can lead to defects.
Leveling: After withdrawal, the coating surface may have uneven areas. The coating naturally levels out during this phase, ensuring a smooth, uniform surface.
Curing
Curing is the process of hardening the silicone coating and achieving chemical stability. The curing method depends on the silicone type.
Curing Methods:
- Heat Curing: The coated substrate is heated in an oven to initiate the crosslinking of the silicone molecules.
- Room Temperature Curing: Some silicones cure at ambient temperatures, and the crosslinking happens naturally over time.
- UV Curing: For certain formulations, ultraviolet (UV) light can be used to cure the coating. This is often used for quick curing.
Important Curing Parameters:
- Temperature: The curing temperature must be carefully controlled. Too high or too low a temperature can affect the final properties of the coating.
- Time: The curing time also affects the quality of the coating. A longer curing time may be needed for thicker coatings.
- Humidity: Some silicones require specific humidity levels to cure effectively.
Post-curing: After initial curing, some silicone coatings may require post-curing (secondary curing) to further improve mechanical properties and ensure full crosslinking.
Post-treatment
Once the coating is fully cured, post-treatment processes are often necessary to complete the coating process.
- Cleaning: After curing, any excess coating or contaminants must be removed. This is often done through washing or wiping.
- Surface Modification: If necessary, surface treatments such as sanding, polishing, or chemical treatments may be applied to enhance the coating’s performance or appearance.
This structured process ensures that the final silicone dip coating is uniform, durable, and suitable for various applications. The details provided in each step help ensure a high-quality result that meets performance standards.
Factors Influencing the Silicone Dip Coating Process
Several factors can significantly impact the quality and effectiveness of the silicone dip coating process. Here are some key elements to consider:
Viscosity of the Silicone Solution
The viscosity of the silicone solution plays a crucial role in the uniformity of the coating. If the solution is too thick, it may not coat the substrate evenly, leading to areas with excessive build-up. Conversely, if it’s too thin, the coating may be too weak or uneven. Achieving the right viscosity ensures a smooth and even layer is applied.
Dipping Speed and Withdrawal Rate
The speed at which the substrate is dipped into and withdrawn from the silicone solution directly affects the coating’s thickness and uniformity. A consistent, controlled withdrawal speed prevents defects such as streaks or uneven layers. Variations in speed, either too fast or too slow, can lead to coating inconsistencies.
Environmental Conditions
Temperature and humidity in the environment can influence the curing and overall quality of the silicone coating. High humidity levels can interfere with curing, especially with certain silicone types that require specific moisture levels. It’s essential to maintain a controlled environment for consistent results.
Surface Cleanliness and Preparation
As discussed earlier, the cleanliness of the substrate is critical for proper adhesion. Even a small amount of dust or oil can prevent the silicone from bonding effectively. Pre-treatment steps such as solvent cleaning or plasma treatment are vital for removing contaminants and ensuring a good bond.
Curing Time and Temperature
The curing phase is a critical factor that determines the strength and durability of the silicone coating. The temperature must be within a specific range, and the curing time should be long enough to allow complete crosslinking. Improper curing conditions can result in coatings that are either too soft or not fully bonded.

Which Materials Can Be Silicone Dip Coated?
Silicone dip coating is suitable for a variety of substrates. However, to achieve optimal results, certain materials are preferred. Here are some common materials that can be coated with silicone:
Metals
Metals such as stainless steel, aluminum, and brass are commonly used for silicone dip coating due to their stability and strength. The silicone coating provides excellent protection against corrosion, thereby enhancing the longevity of the metal components.
Plastics
Plastics like ABS, PVC, and polypropylene can be coated with silicone to improve their durability, heat resistance, and grip. Proper pre-treatment, such as plasma treatment, is essential to ensure good adhesion.
Glass
While less common, glass substrates can be coated with silicone, particularly in applications such as medical devices and specialized coatings. Silicone enhances the heat resistance and slip properties of glass in these cases.
Rubber
Silicone can also be applied to rubber materials to improve their resistance to weathering, chemicals, and heat. This is especially useful in industries where flexibility and durability are needed, such as automotive and consumer goods.
Ceramics
Though less commonly used, ceramics can benefit from silicone coatings, especially for surface protection and added color in certain applications.
Wood
While not typical, silicone coatings can be applied to wood surfaces for additional water resistance and flexibility. The wood must undergo proper pre-treatment to ensure adhesion.
Advantages of Silicone Dip Coating
Advantages:
- Cost-effective: It is ideal for large-scale production with high material efficiency.
- Simple Process: Compared to other coating techniques, silicone dip coating is relatively easy to operate.
- Good Coating Uniformity: It provides an even coating on surface.
- Controllable Coating Thickness: By adjusting process parameters, the thickness of the coating can be controlled.
- Excellent Coverage: The process can cover all corners and gaps of an object.
Applications of Silicone Dip Coating
Silicone dip coating has a wide range of applications in several industries.
| Industry | Product | Features |
| Medical | Catheters, Surgical Tools, Probe Covers | Flexibility, Biocompatibility, Patient Safety, Improved Comfort |
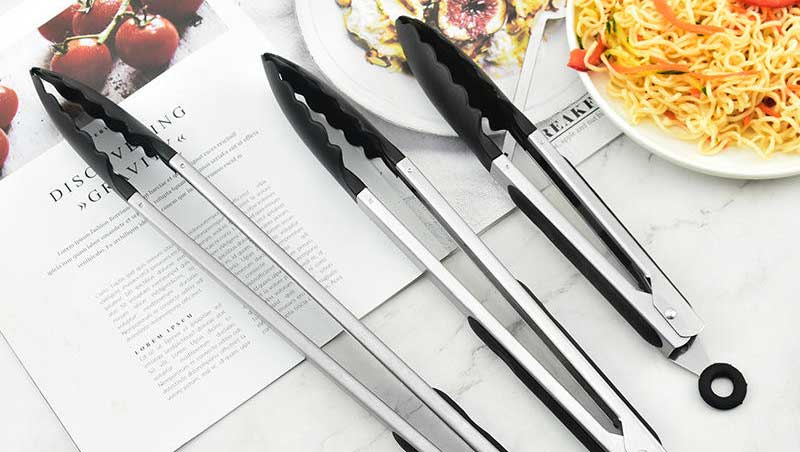
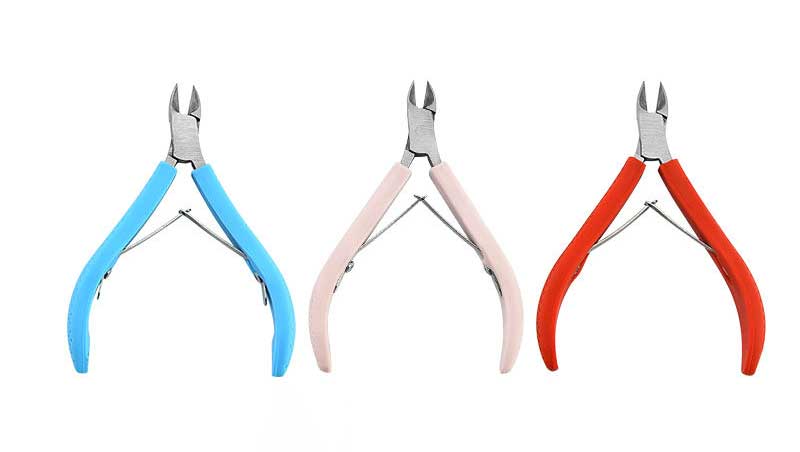
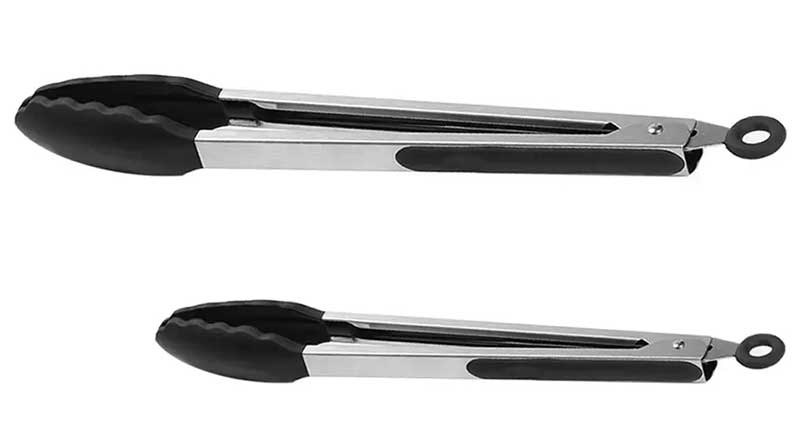
| Tool | Pliers, Wrenches, Screwdrivers | Non-slip Grip, Comfort, Durability, Extended Lifespan |
| Electronics | Circuit Boards, Sensors | Moisture Protection, Environmental Resistance, Increased Durability |
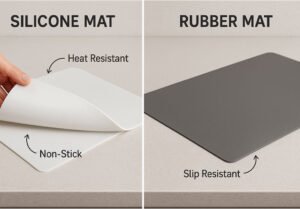
| Kitchenware | Glass Bakeware, Baking Pans | Heat Resistance, Easy Cleaning, Non-stick Surface |
| Automotive | Car Handles, Gaskets | Wear Resistance, Heat Resistance, Vibration Damping |
| Consumer Goods | Toys, Household Items | Soft Touch, Durability, Non-toxicity |
Silicone Dip Coating vs. Silicone Dip Molding
While both silicone dip coating and silicone dip molding involve dipping substrates into liquid silicone, they serve different purposes and are applied in different ways. Here’s how the two processes compare:
| Feature | Silicone Dip Coating | Silicone Dip Molding |
| Purpose | To apply a thin protective, flexible silicone coating onto a substrate. | To create a thick silicone mold around a core or object. |
| Thickness of Coating | Typically results in a thin, even coating (microns to millimeters). | Results in a much thicker coating, often several millimeters thick. |
| Application | Used for adding a protective layer or grip to objects (e.g., handles, medical tools). | Used for creating a mold or form that fully encapsulates the object (e.g., silicone molds for manufacturing parts). |
| End Product | Finished product with enhanced properties like grip, durability, or resistance. | A full mold or a shell formed around the core object, often used for further processes. |
| Molding Core | No core required. The substrate itself serves as the item to be coated. | Requires a core object to form the silicone around. |
| Curing Process | Coating is cured after dipping (usually heat, room temperature, or UV curing). | Mold is typically cured at elevated temperatures to harden the silicone. |
| Complexity of Process | Simpler process, ideal for large-scale coating of uniform items. | More complex due to the need for a core and thicker silicone layers. |
| Cost | More cost-effective for large-scale coating operations. | Typically more expensive due to the need for molds and longer curing times. |
Comparison with other common coating technologies
The following table provides a comparison of silicone dip coating, spraying, and brushing techniques. It highlights key aspects such as coating uniformity, adaptability to complex shapes, control over coating thickness, material usage, and more. By examining these factors, we can better understand the strengths and limitations of each method, helping to choose the most suitable coating technique based on specific needs and applications.
| Aspect | Silicone Dip Coating | Spraying | Brushing |
| Coating Uniformity | Good | Variable | Poor |
| Complex Shape Adaptability | Excellent | Good | Poor |
| Coating Thickness Control | Moderate | Flexible | Inconsistent |
| Material Usage | High | Low | High |
| Efficiency | High | Moderate | Low |
| Equipment Cost | Medium | Medium | Low |
| Skill Requirements | Low | High | Low |
| VOC Emissions | Variable | High | Low |
| Applications | Versatile | Large Areas | Small Areas |
| Surface Finish | Smooth | Smooth | Brush Marks |
| Cost | Medium | Medium | Low |

Common Problems and Solutions in Silicone Dip Coating
Silicone Dip Coating is a reliable process, but issues can pop up during application. Knowing how to spot and fix these problems ensures a smooth, high-quality coating. Below, we’ll dive into the most common challenges—uneven coating, poor adhesion, curing troubles, and bubbles or pinholes—along with practical solutions to tackle them.
Uneven Coating: Sometimes, the silicone layer looks patchy or uneven. This happens if your withdrawal speed isn’t steady or the solution’s viscosity isn’t right.
Solution: Keep your withdrawal speed steady—slow and steady gives the best results. Check the viscosity too. If it’s too thick, thin it with a little solvent. If it’s too runny, adjust the mix or let it sit for a bit. Test on a small piece first to get it right.
Poor Adhesion: The silicone might not stick well to the object, peeling off easily. This usually means the surface isn’t clean or compatible with the silicone.
Solution: Clean the surface well with soap, water, or a solvent like alcohol to remove dirt or oil. If that doesn’t work, try sanding or applying a primer to improve adhesion. Make sure the primer matches your silicone for the best result.
Curing Issues: The coating might stay sticky or not harden properly. This can stem from wrong curing temperature, timing, or contamination on the surface.
Solution: Double-check the curing conditions—most silicones need a specific heat (like 150-200°C) and time (a few minutes to an hour) to set. Follow the manufacturer’s guide. Also, ensure the object and solution are free of dust or moisture, as these can mess up curing. A clean workspace and proper oven settings usually fix this.
Bubbles or Pinholes: Tiny air bubbles or holes can appear in the coating, making it look rough or weak. This happens if air gets trapped in the solution or if the object isn’t clean.
Solution: Degass the silicone solution before dipping—stir it slowly or use a vacuum pump to pull out air. Clean the object well to remove dust or residue. Dipping slowly and steadily also helps avoid bubbling.
Conclusion
Silicone dip coating is a reliable and cost-effective method for improving the performance and durability of products. By carefully managing each step, manufacturers can achieve uniform, high-quality coatings that enhance the product’s functionality and longevity. While common issues like uneven coating, poor adhesion, and curing problems may arise, they are easily addressed with the right adjustments.
If you have a need to produce silicone products, you can contact us. With years of experience, we can provide you with products that perfectly meet your requirements.