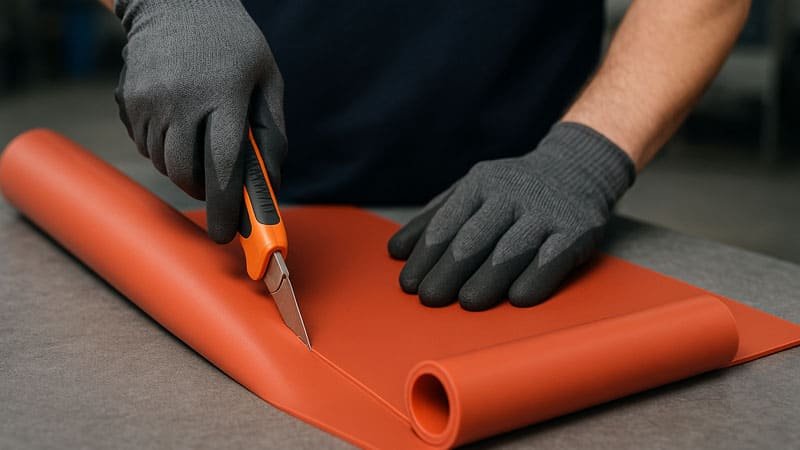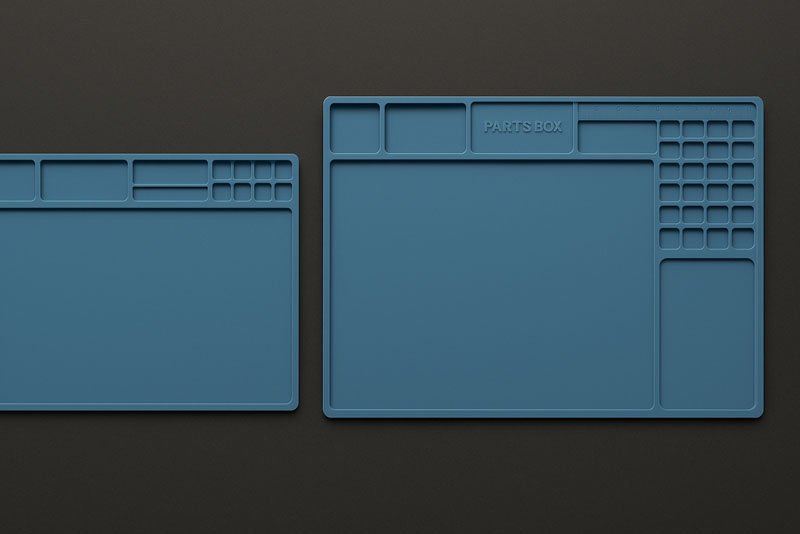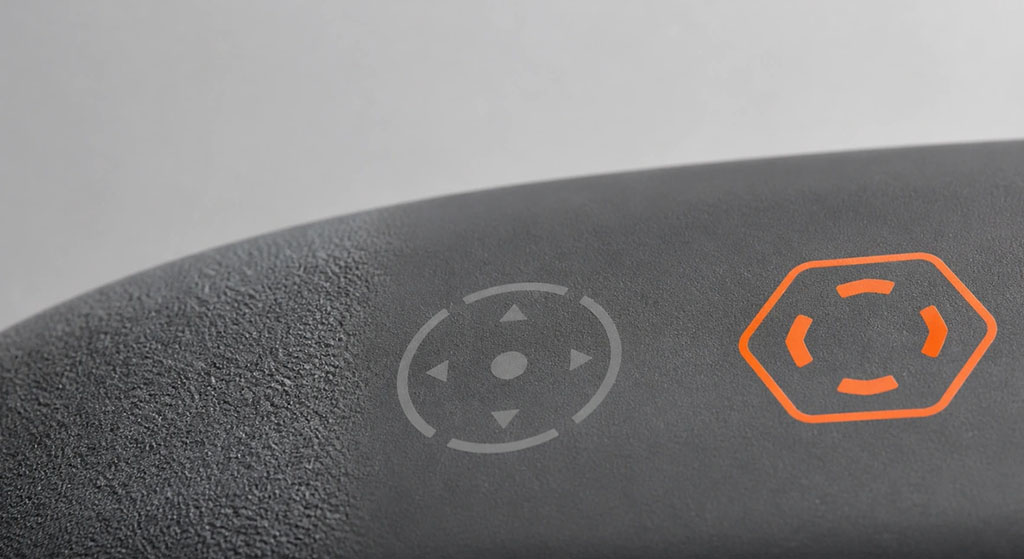
A silicone product surface pattern can be molded into the part, marked after molding, or added as a coating or printed layer. These routes may look similar on a new sample, but they do not age the same way. The practical choice depends on whether the surface must provide grip, carry branding, survive cleaning, meet food-contact requirements, or hold a controlled cosmetic standard across production batches.
The most durable patterns are normally built into the mold. Printed and coated finishes provide more color and visual freedom, but their service life depends on surface preparation, curing, and the actual abrasion, chemical, heat, and UV exposure.
Executive Summary
- Use a molded texture, embossed feature, or debossed feature when wear resistance and batch consistency matter more than color detail. The pattern is part of the silicone geometry rather than a separate surface layer.
- Use laser marking, pad printing, or screen printing for fine graphics and variable designs, but validate contrast, adhesion, and wear on the actual silicone formulation—not only on a flat test plaque.
- Treat plasma or chemical activation as adhesion preparation, not as a permanent decorative finish. Its effect can decay before printing or coating, so the time between treatment and the next operation must be controlled.
How Is a Silicone Product Surface Pattern Created?
There are three basic routes: create the pattern in the tooling, modify the cured silicone surface, or add material onto the surface.
| Route | Common processes | What creates the visible or tactile effect | Main durability boundary |
|---|---|---|---|
| Molded-in pattern | Mold polishing, blasting, EDM texture, CNC engraving, embossed or debossed tooling | The mold surface transfers geometry to the silicone | Tool wear, contamination, demolding damage, and texture replication |
| Direct surface modification | Laser marking or controlled etching | The cured surface is locally modified | Contrast, heat effect, shallow mark depth, and formulation sensitivity |
| Added surface layer | Pad printing, screen printing, spray coating, soft-touch coating | Ink or coating bonds to the silicone | Adhesion, cure, abrasion, solvents, heat, moisture, and UV |
| Adhesion pre-treatment | Plasma, corona, primer, or qualified chemical treatment | Raises surface energy before printing, bonding, or coating | Treatment decay, contamination, handling, and delay before the next process |
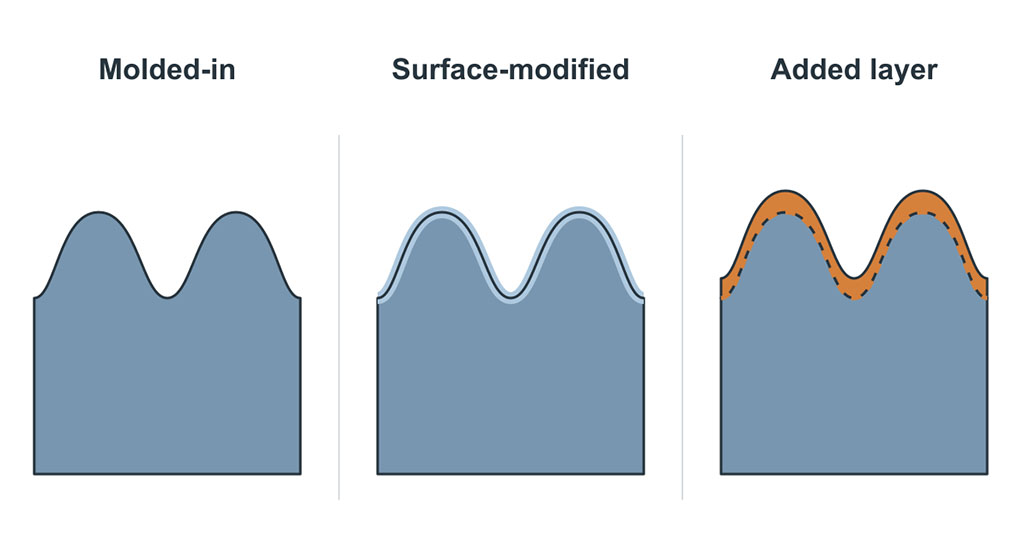
This classification matters because “surface pattern” is often used as one specification even though it covers different failure mechanisms. A molded matte texture cannot peel. A soft-touch coating can. A printed logo can lose contrast without changing the base texture. These should not share one acceptance criterion.
When Should the Pattern Be Built Into the Mold?
Molded texture is the default choice for durable grip, matte appearance, anti-slip areas, and permanent embossed or debossed branding. The finish is replicated during compression molding or liquid silicone rubber injection molding, so no secondary decorative layer is required.
Mold engraving and texturing
CNC machining, EDM, laser texturing, polishing, and controlled blasting can all be used on the mold surface. The correct method depends on feature size, texture geometry, mold steel, draft direction, and the required cosmetic class.
Deep textures are not automatically better. As texture depth increases, the silicone has to fill smaller recesses and release from more aggressive features. This can change venting behavior, demolding force, gloss, and the risk of tearing around thin walls.
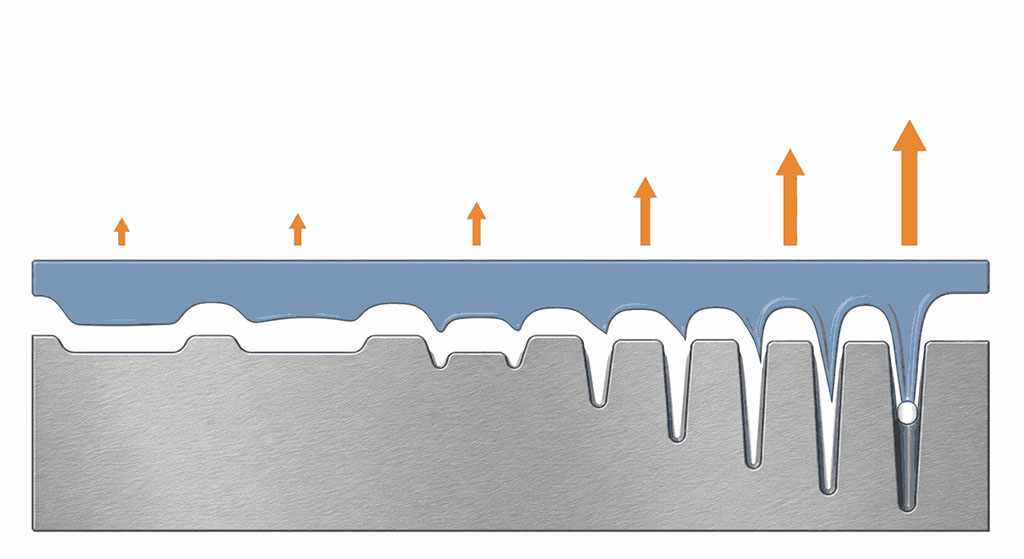
Embossed and debossed features
An embossed feature stands above the surrounding silicone surface. A debossed feature is recessed. Both are durable because the mark is part of the molded geometry.
For small text and logos, the tooling review should check:
- minimum line width and spacing;
- feature depth and corner radius;
- draft and release direction;
- distance from parting lines and gates;
- risk of trapped air in fine recesses;
- cleaning access for food-contact or medical-use parts.
Teams often approve a logo from a 2D drawing without reviewing how it will release from the tool. The geometry may be machinable but still produce incomplete fill, trapped air, or distorted edges in production.
How Do Mold Texture and Silicone Hardness Affect Tactile Feel?
Tactile feel comes from the combination of surface geometry and bulk material behavior. The same mold texture can feel different on soft silicone and firm silicone because the surface deforms differently under finger pressure.
| Surface choice | Typical feel | Suitable use | Production concern |
|---|---|---|---|
| Polished mold surface | Smooth and higher gloss | Sealing areas, clean cosmetic surfaces | Flow lines, fingerprints, and minor defects may be more visible |
| Fine matte texture | Dry, low-gloss touch | Consumer housings, baby products, handles | Gloss must be controlled across cavities and mold maintenance cycles |
| Coarse texture | Stronger grip and visual masking | Grips, mats, protective parts | Higher demolding force and more difficult cleaning |
| Micro-pattern | Local tactile cue or functional contact | Keypads, buttons, interface zones | Fine geometry may not reproduce consistently at low fill pressure |
| Soft-touch coating | Low-friction or premium tactile effect | Selected consumer surfaces | Coating wear, contamination, cure, and chemical resistance |
Texture should therefore be approved on production-intent material and hardness. A texture plaque molded in a different Shore A hardness is useful for visual screening, but it is not a reliable final approval sample.
When Is Laser Marking Better Than Molded Geometry?
Laser marking is useful when the design is fine, the mark must be added after molding, or tooling changes would be too slow or expensive. It can support serial information, alignment marks, icons, and selected branding details.
The limitation is formulation sensitivity. Silicone color, fillers, pigments, and additives influence the achievable contrast and the heat-affected surface. A laser setting that works on black silicone may not produce a readable or cosmetically acceptable result on translucent or light-colored material.
Laser trials should verify
- contrast under the specified lighting condition
- edge definition on curved surfaces
- mark consistency across pigment batches
- surface residue or tack change
- readability after rubbing, cleaning, and UV exposure
- whether the marked zone contacts food, skin, or a sealing interface.
Laser marking is non-contact, but that does not make it risk-free. Excess energy can change gloss, create residue, or damage a thin section. The process window must be established on the finished part geometry.
When Should Pad Printing or Screen Printing Be Used?
Use printing when the design needs color, fine graphics, or artwork that cannot be reproduced as mold geometry. Pad printing is normally more suitable for curved, recessed, or irregular surfaces. Screen printing is efficient on flatter areas and can apply larger graphic fields.
| Process | Strongest use case | Main advantage | Main limitation |
|---|---|---|---|
| Pad printing | Small graphics on curved or irregular parts | Transfers fine artwork to non-flat surfaces | Ink thickness and position can vary with pad condition and part fixturing |
| Screen printing | Larger graphics on flat or gently curved surfaces | Good color coverage and repeatability at volume | Distortion and registration become harder on complex geometry |
| Spray or coated finish | Full-area color, gloss, low-friction, or tactile effect | Changes the overall surface appearance and feel | Adds a layer that can scratch, peel, swell, or change after repeated cleaning |
Silicone has low surface energy, so ink adhesion cannot be assumed. Printing often needs plasma, corona, primer, or another qualified activation process. Cleanliness is equally important. Mold release residue, dust, hand oils, and silicone blooming can reduce adhesion even when the ink and curing schedule are unchanged.
The common judgment gap is to approve appearance immediately after printing. Initial adhesion can look acceptable, while repeated flexing, IPA wiping, dishwashing, skin oil exposure, or UV reveals the weak interface later.
What Does Plasma Treatment Actually Do?
Plasma treatment activates the silicone surface to improve wetting and bonding. It is commonly used before printing, coating, or adhesive assembly. It does not usually create a meaningful visible texture by itself.
The effect is time-sensitive. After treatment, the activated surface gradually recovers toward lower surface energy. Contamination and handling can accelerate the loss of useful adhesion performance. For production, the specification should control the maximum delay between plasma treatment and printing or coating, along with part storage and handling conditions.
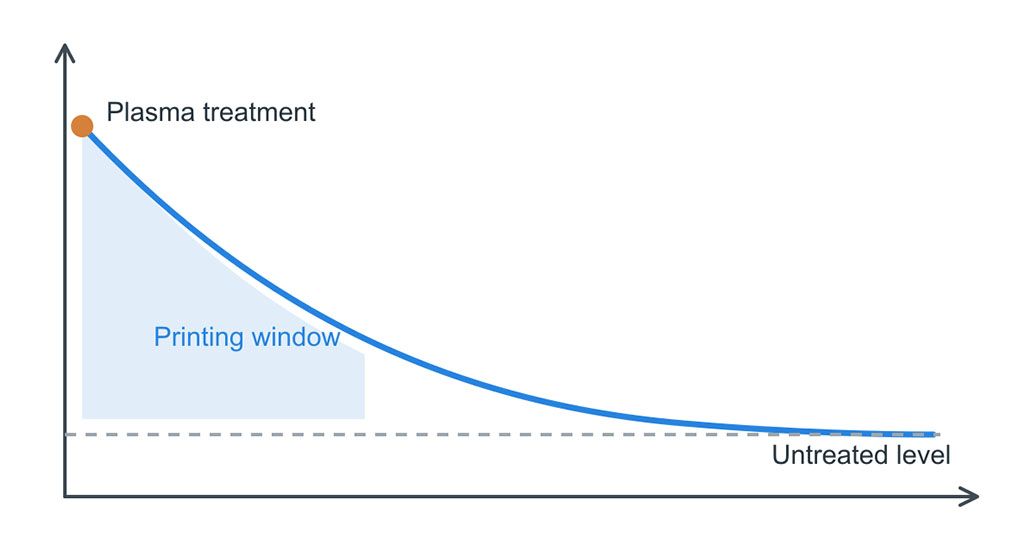
Plasma settings also require control. Power, exposure time, nozzle distance, line speed, and fixture orientation influence treatment uniformity. A pass/fail statement such as “plasma treated” is not enough for repeatable production.
How Should Silicone Surface Pattern Durability Be Tested?
The test must match the surface construction and actual use. A molded texture, printed graphic, and coating need different acceptance criteria.
| Test | Best suited to | What it can reveal | Important boundary |
|---|---|---|---|
| Visual and gloss comparison | Mold texture, laser marks, coatings | Batch mismatch, polishing drift, uneven treatment | Lighting, viewing angle, and reference standard must be fixed |
| Cross-hatch adhesion, such as ASTM D3359 where applicable | Coatings and some printed layers | Loss of adhesion at the interface | Suitability depends on coating thickness, flexibility, and substrate geometry |
| Controlled rub or abrasion test | Printing, coatings, laser contrast | Wear, fading, polishing, or edge breakdown | Load, abrasive material, stroke, and cycle count must reflect use |
| Solvent wipe | Inks and coatings | Softening, color transfer, swelling, or adhesion loss | Solvent type, concentration, pressure, and dwell time must be specified |
| Heat and humidity cycling | Coatings, printing, bonded decoration | Cure weakness, blistering, loss of adhesion | Exposure must reflect storage and service conditions |
| Dishwasher or boiling cycle | Kitchen and baby products | Combined heat, moisture, detergent, and mechanical wear | A single hot-water soak does not represent repeated washing |
| UV exposure | Outdoor or high-light-use parts | Color shift, chalking, gloss loss, or embrittlement | Lamp type, irradiance, temperature, and duration affect comparability |
| Flex and compression cycling | Keypads, grips, flexible housings | Cracking or delamination on deforming zones | Test the real strain location, not only a flat coupon |
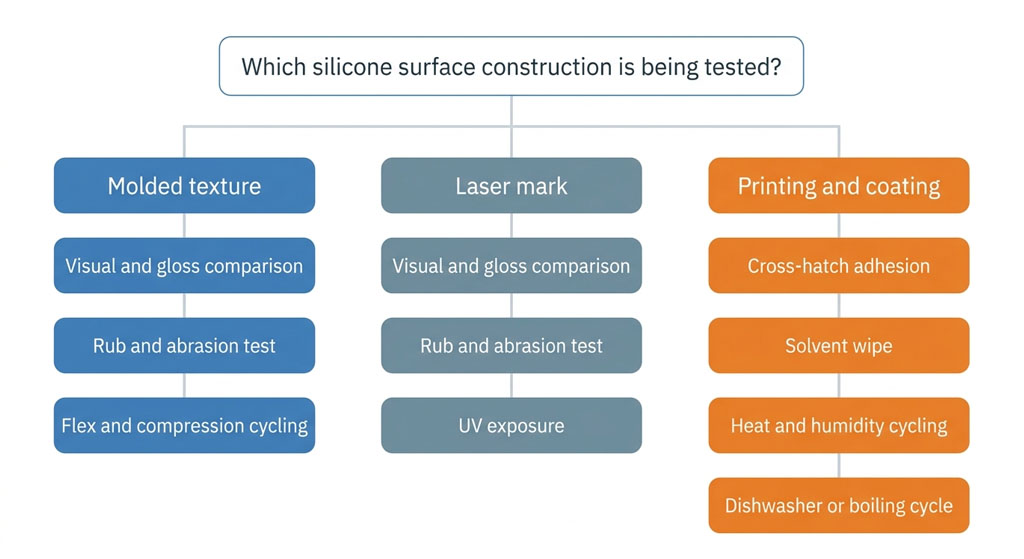
Do not copy a cycle target from another product and treat it as universal. A kitchen spatula, wearable band, industrial keypad, and baby spoon see different combinations of abrasion, detergent, heat, skin oil, flexing, and UV. The test plan should be tied to the service profile and agreed before final surface approval.
Will a Coating Peel in a High-Temperature Dishwasher?
It can. The main risks are poor surface preparation, incomplete cure, incompatible coating chemistry, edge exposure, repeated flexing, and the combined effect of heat, alkaline detergent, moisture, and mechanical contact.
A coating that passes a dry abrasion test may still fail in a dishwasher because water and detergent reach the coating interface. Failure often starts at edges, thin spots, gates, parting-line flash areas, or zones that are repeatedly bent. Teams commonly test the center of a flat coated plaque and miss these production-part stress points.
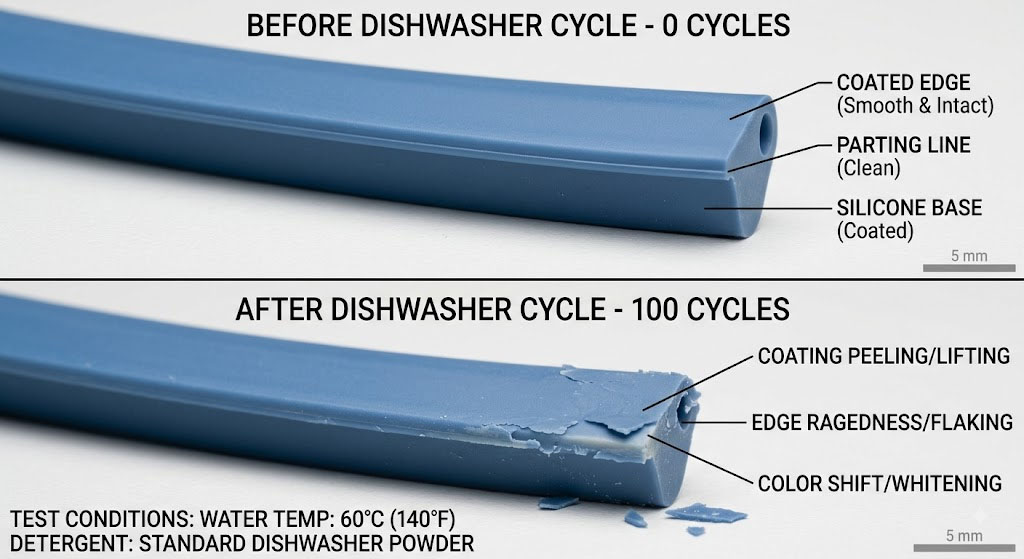
For dishwasher-exposed parts, validation should use finished components from the intended process. Inspect adhesion, color transfer, gloss change, tack, blistering, and edge lift at defined intervals rather than only at the final cycle.
What Changes for Food-Contact and Baby Silicone Products?
A compliant silicone compound does not automatically make every printed or coated finish suitable for food contact. The finished construction must be reviewed, including pigments, inks, primers, coatings, curing agents, and any residues from surface preparation.
FDA 21 CFR 177.2600 and LFGB testing are commonly referenced for silicone food-contact applications, but the applicable requirement depends on the target market, contact type, temperature, duration, and finished article. A supplier statement for the base elastomer should not be used as evidence for an added coating that has not been evaluated.
For food-contact or baby-use designs, the lower-risk route is often a molded texture with no added decorative layer in the contact area. If printing or coating is necessary, define:
- whether the decorated zone contacts food or the mouth;
- expected boiling, steam, or dishwasher exposure;
- saliva, detergent, oil, acid, and alcohol contact;
- migration or extractables requirements for the destination market;
- cleaning validation and visual acceptance after repeated cycles.
Chemical etching also needs residue control and documented compatibility. “Washed after treatment” is not a sufficient validation statement where migration risk matters.
How Do Surface Treatments Affect Mass-Production Consistency and Cost?
Molded texture usually adds tooling work but removes a recurring secondary operation. Printing and coating reduce some tooling constraints but add fixtures, treatment, curing, inspection, handling, and scrap risk to every production lot.
| Cost or control factor | Molded texture | Laser marking | Printing | Coating |
|---|---|---|---|---|
| Initial setup | Tool texture development and approval | Laser trials and fixture | Artwork, plate or screen, pad and fixture | Masking, spray or application setup, cure development |
| Recurring operation | Low after molding is stable | Machine cycle and inspection | Treatment, ink mixing, printing, curing, inspection | Preparation, application, curing, handling, inspection |
| Change flexibility | Low; tool modification may be required | High for digital mark changes | Medium; artwork tooling changes required | Medium for color or coating changes |
| Main scrap driver | Fill, release, contamination, cavity mismatch | Contrast or positioning drift | Adhesion, registration, contamination, cure | Dust, thickness variation, adhesion, runs, edge defects |
| Durability potential | High because geometry is integral | Medium to high when formulation and settings are stable | Application-dependent | Application-dependent and usually most exposure-sensitive |
Key process controls may include mold surface reference samples, cavity-level gloss checks, blasting media condition, laser program revision, plasma-to-print time, ink mix ratio, pot life, cure temperature, coating thickness, fixture position, and defined inspection lighting.
These controls are not interchangeable. For example, measuring coating thickness does not prove adhesion, and passing adhesion does not prove color stability after UV or detergent exposure.
How Should You Choose the Right Silicone Surface Process?
Start with the function of the surface, not the artwork file.
Choose molded texture or embossed/debossed geometry when:
- grip or tactile function is the primary requirement;
- the part will be washed, rubbed, flexed, or handled repeatedly;
- color is not required in the pattern;
- long-term batch consistency matters;
- the surface is in a food-contact or mouth-contact zone where added layers create avoidable validation work.
Choose laser marking when:
- the graphic is fine or variable;
- tooling changes are undesirable;
- one-color contrast is acceptable;
- the silicone formulation can produce stable contrast;
- the marked area can be validated for its contact and wear conditions.
Choose pad or screen printing when:
- the design requires one or more colors;
- the graphic cannot be formed cleanly in the tool;
- the surface geometry matches the transfer method;
- plasma or primer, curing, and durability testing can be controlled as production operations.
Choose a coating when:
- the full surface needs a specific gloss, color, friction, or tactile behavior;
- the added performance justifies the higher validation and process-control burden;
- abrasion, chemical, heat, moisture, UV, and flex exposure have defined acceptance criteria.
What Must Be Specified Before Tooling and Sampling?
A usable surface specification should include more than “matte,” “laser logo,” or “soft touch.” Provide the target surface zone, visual reference, texture or gloss requirement, silicone material and hardness, color, contact classification, cleaning method, service environment, expected flexing, and durability test.
The manufacturing route can then be selected around the real boundary:
- If the pattern must survive for the life of the part, make it part of the geometry where possible.
- If the pattern must carry color or variable information, accept that adhesion and wear become controlled characteristics.
- If a coating is used in a demanding contact zone, validation time and recurring process control belong in the cost—not only the coating material.
For a production review, the minimum useful inputs are a 3D model, marked surface zones, artwork, silicone grade and hardness, target market, contact condition, cleaning cycle, visual standard, and expected annual volume. Without those inputs, a surface-process recommendation is only a cosmetic guess.
References
- ASTM G154, Standard Practice for Operating Fluorescent Ultraviolet (UV) Lamp Apparatus for Exposure of Nonmetallic Materials — ASTM International
- ASTM D2240, Standard Test Method for Rubber Property—Durometer Hardness — ASTM International, 15(2021)
- Electrical discharge machining (mold texturing background) — Wikipedia