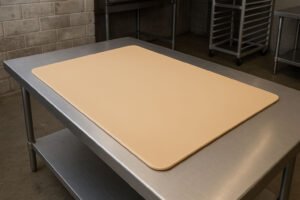
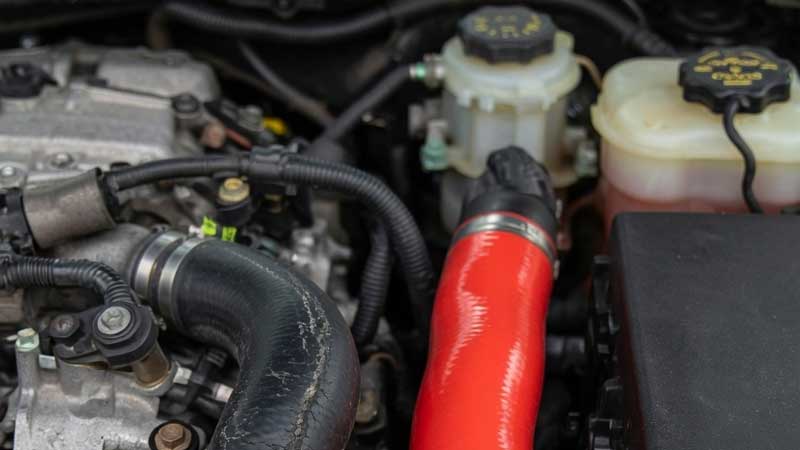
Choosing a silicone printing method from artwork alone is a common sourcing mistake. A logo may look simple on screen, yet its location sits across a dome, wraps around a wristband, or compresses under every button press. Once tooling is made, changing the method usually means rebuilding fixtures, plates, screens, or transfer films.
For silicone parts, use pad printing for small graphics on curved or irregular surfaces, screen printing for larger graphics on flat or single-axis surfaces, and transfer printing for detailed multi-color graphics that can be applied through a carrier. Geometry comes first; color count and volume come after it.
Executive Summary
- Choose by print-face geometry first. Pad printing handles localized 3D surfaces; screen printing needs a flat or controlled single-axis path; transfer printing needs the carrier and press tool to contact the complete image area.
- Do not compare color count without registration risk. Every additional pad or screen color adds a separate print position. Transfer printing consolidates complex artwork, but introduces carrier, heat, pressure, and edge-bonding constraints.
- MOQ and unit cost are outputs, not fixed method specifications. Tool count, color changes, fixture stability, pretreatment, inspection, and expected scrap determine the economic batch size.
Pad Printing vs Screen Printing vs Transfer Printing on Silicone: Decision Table
The three methods are not interchangeable production routes. Each controls ink contact in a different way, so each fails at a different boundary.
| Decision factor | Pad printing | Screen printing | Transfer printing |
|---|---|---|---|
| Best surface geometry | Domed, recessed, curved, or irregular local areas | Flat parts, broad panels, and controlled single-axis curves | Flat to shallow-curved areas where a carrier and press tool can make uniform contact |
| Typical graphic | Small logo, keypad legend, symbol, isolated marking | Larger logo, text block, continuous graphic, broad ink area | Detailed multi-color image, layered graphic, gradient, or wrap-style decoration |
| Color strategy | Usually low-count spot colors; each color adds a plate and print station | Spot colors; each color adds a screen and registration step | Better suited to complex multi-color artwork prepared on a carrier |
| Registration behavior | Sensitive to pad deformation and compression of the silicone part | Stable on a well-fixtured flat part; less stable when the part stretches or rolls | Colors are registered before application, but the complete transfer can distort during pressing |
| Coverage | Small, localized print area | Medium to large print area | Medium to large area, subject to carrier conformity and press access |
| Texture tolerance | Can reach modest texture and local curvature, but fine detail falls off as the surface becomes rougher | Works best on consistent surfaces with a controlled print path | Surface texture can interrupt full contact and leave edge or void defects |
| Design-change cost | New cliché for changed artwork; new fixture if print location changes | New screen for changed artwork; fixture changes if position changes | New transfer artwork or film; press fixture may also change |
| Short-run economics | Often strongest for a simple one-color localized print | Setup becomes harder to absorb when area or color count increases | Artwork and transfer preparation can dominate a short run |
| High-volume economics | Good when a stable fixture and automated cycle are available | Strong for repeatable large-area graphics and long runs | Strong when a validated transfer is repeated at scale with low reject rates |
| Main rejection condition | Graphic is too large, too far around the part, or too registration-sensitive | Screen cannot maintain contact with the geometry | Carrier cannot contact the full area evenly or the part cannot tolerate the transfer window |
These are selection boundaries, not machine setup instructions. For plate depth, pad durometer, ink ratio, and cure behavior, use the dedicated guide to pad printing on silicone. Mesh, squeegee, and direct-print controls belong in silicone screen printing. Film construction and heat-transfer parameters belong in silicone transfer printing.
Which Method Fits the Shape of the Silicone Part?
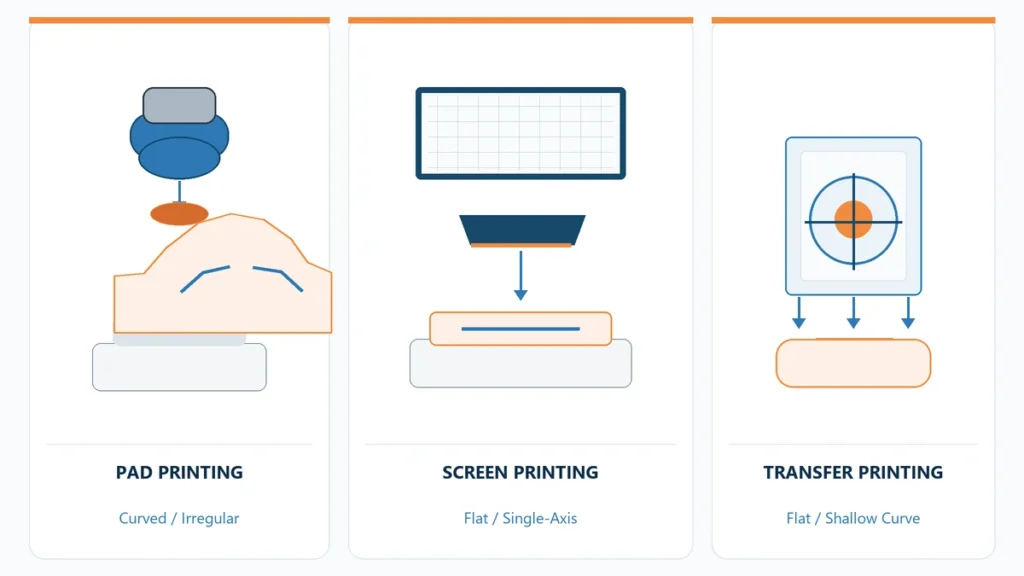
Pad printing is the default when the image sits on a localized three-dimensional feature. Screen printing is the default when the print path can remain flat or follow one controlled curve. Transfer printing only works when the carrier and pressing tool can contact the entire design with consistent pressure.
Geometry should be judged at the print face, not from the overall product category. A silicone keypad may have a flat web but domed keys. A wristband may look cylindrical but flatten under a fixture. A baby product may have a broad face interrupted by ribs, draft angles, and parting lines.
Use pad printing for localized 3D features
Pad printing is usually the safer choice for:
- Individual keypad legends on domed key tops
- Small logos on molded grips or housings
- Marks close to a recess, step, or changing radius
- Parts that cannot be presented under a flat screen path
The boundary is image area. A pad can conform to curvature, but it also stretches the image as it rolls on and off the part. Making the pad larger does not remove that distortion. It often moves the distortion to another edge.
Use screen printing for controlled surfaces
Screen printing is usually the cleaner route for:
- Flat silicone mats and sheets
- Large logos on broad molded panels
- Long text or graphics on a controlled single-axis curve
- Repeat production where a consistent fixture holds the print face at the same height
A screen needs predictable contact and release. Compound curves, domes, deep recesses, and abrupt height changes interrupt that path. Teams often underestimate this because the artwork is flat in CAD; the print surface is not.
Use transfer printing when the carrier can reach the full image
Transfer printing becomes attractive when the artwork carries more detail or more colors than direct printing can register economically. It is not automatically the best method for every curved part.
The carrier must contact the complete image area. Deep texture, undercuts, compound domes, sharp radius changes, and inconsistent part compression create local pressure differences. A transfer may look acceptable from the front while its edge bond or fine details vary around the curve.
How Do Artwork and Color Count Change the Decision?
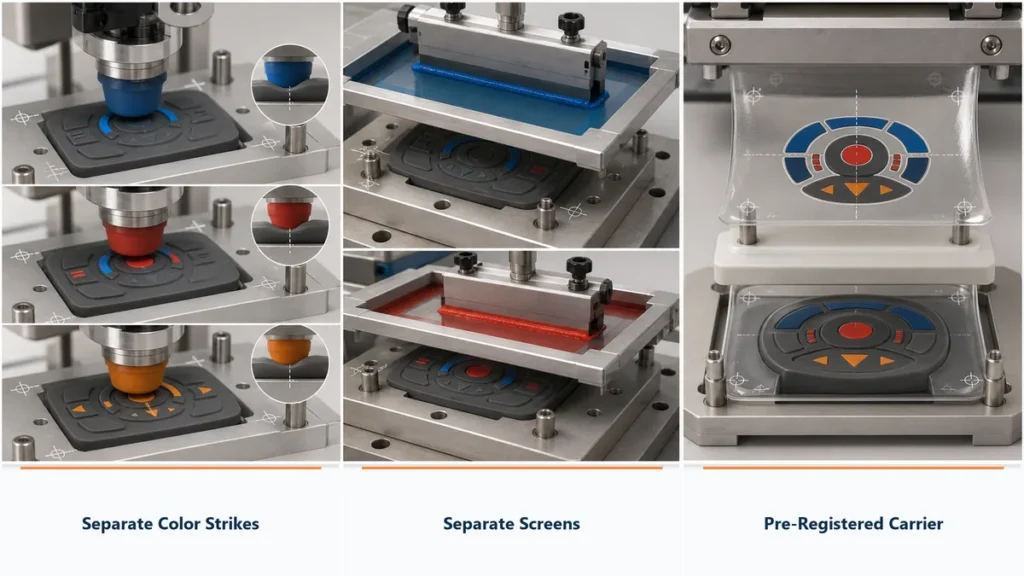
Pad and screen printing build multi-color artwork one registered color at a time. Transfer printing prepares the composite graphic before it reaches the silicone part. This is why transfer printing gains an advantage as color count, fine detail, gradients, or layered effects increase.
| Artwork condition | Preferred starting method | Reason |
|---|---|---|
| One-color logo on a curved molded feature | Pad printing | Local geometry matters more than area or color complexity |
| One- or two-color large logo on a flat part | Screen printing | Direct coverage is efficient and registration remains controllable |
| Fine multi-color graphic on an accessible flat or shallow-curved area | Transfer printing | Complex registration is handled on the carrier rather than on a soft part |
| Tight multi-color registration on a soft keypad | Redesign first; then evaluate pad or transfer | The silicone part deforms between print positions |
| Large solid color area requiring strong opacity | Screen printing or validated transfer | Coverage and film uniformity matter more than fine resolution |
| Graphic crossing ribs, recesses, or a parting line | Reposition or split the artwork | None of the three methods removes the geometry discontinuity |
Color count is not just an artwork decision. Each direct-print color adds handling, setup, cleaning, inspection, and a new opportunity for positional drift. On soft silicone, the part may not recover to the same shape after each contact. A machine can repeat its stroke while the substrate changes underneath it.
Transfer printing reduces separate color strikes on the part, but it does not eliminate variation. The risk moves to transfer preparation, carrier release, heat and pressure distribution, and distortion during application.
Which Method Gives the Lowest Cost at Your Volume?
There is no universal lowest-cost method or standard MOQ. The economic batch size begins where setup, tooling, and validation can be spread across enough accepted parts.
A one-color pad print on an existing fixture may be economical in a short run. The same method becomes expensive when four colors require multiple plates, stations, and inspection points. A screen print may carry more setup but recover that cost over a long run with a large repeated graphic. A transfer may look expensive at sampling stage yet become competitive when it replaces several direct-print color operations.
Cost structure by method
| Cost element | Pad printing | Screen printing | Transfer printing |
|---|---|---|---|
| Artwork tooling | Cliché for each color and artwork version | Screen for each color and artwork version | Transfer artwork, film, or print preparation |
| Part holding | Rigid fixture is critical on soft or curved parts | Fixture controls height, orientation, and print path | Press fixture or support tool controls contact pressure |
| Changeover | Ink, plate, pad, and color setup | Screen, ink, squeegee, and color setup | Film or transfer change plus press setup |
| Cycle sensitivity | Increases with color count and manual loading | Increases with color count, coverage, and handling | Increases with transfer placement, press cycle, and carrier removal |
| Common scrap driver | Incomplete pickup, distortion, or color misregistration | Smearing, incomplete release, or registration shift | Partial transfer, trapped air, edge lift, or distortion |
| Cost advantage | Small localized graphics and simple color sets | Large repeated graphics on controlled surfaces | Detailed multi-color graphics at repeat volume |
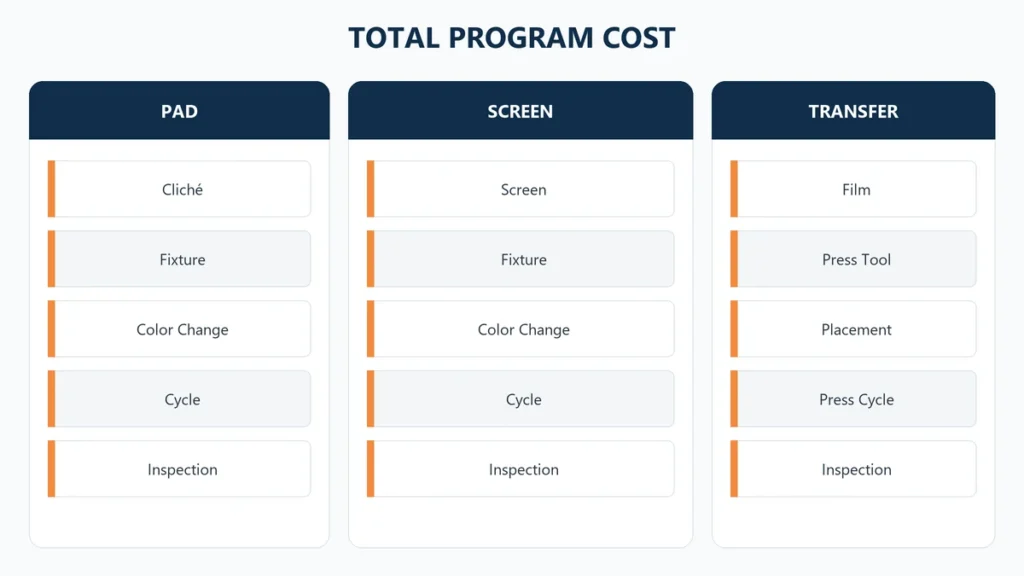
The quote should separate one-time and recurring costs. Combining them into one unit price hides the point where the method becomes economical.
A useful cost model is:
Total program cost = artwork tooling + fixture or press tooling + pretreatment + print operation + cure or transfer cycle + inspection + expected scrap + changeovers.
MOQ follows from this equation. It should not be copied from a supplier’s general capability page.
Does One Printing Method Last Longer on Silicone?
Durability is not determined by the method name alone. It depends on the ink system, surface condition, bond formation, cured film, graphic location, and the actual wear mechanism.
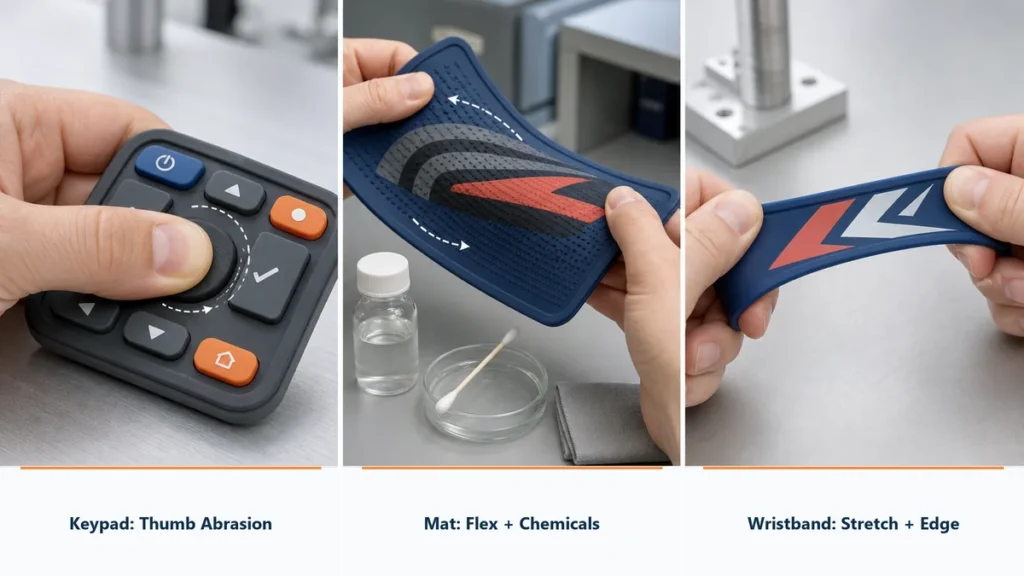
A pad-printed legend on a keypad may face concentrated thumb abrasion. A screen-printed graphic on a mat may face broad flexing and cleaning chemicals. A transfer on a custom silicone wristband may face repeated stretch at the image edge. Calling one method “more durable” without the use condition is not a valid comparison.
Use the service condition to define validation:
| Service condition | Validation that should be specified |
|---|---|
| Repeated finger contact | Defined rub medium, load, cycle count, and acceptance limit |
| Stretching or folding | Elongation or flex cycles at the intended strain |
| Cleaning chemicals | Named chemical, concentration, dwell time, and number of cycles |
| Outdoor exposure | UV, temperature, humidity, and color-change limit |
| Dishwasher or wash use | Detergent, temperature, cycle count, and edge-lift criterion |
| Medical or food-contact use | Applicable ink and finished-part compliance, not a general “food-grade ink” claim |
ASTM D3359-23 and ISO 2409:2020 can support adhesion classification on suitable coated surfaces, but neither standard substitutes for the product’s real rub, flex, chemical, or wash exposure. ISO currently marks the 2020 edition as scheduled for revision, so the applicable edition should be confirmed when the specification is released. The test method must match how the printed area is used.
Surface condition is a shared constraint across all three methods. Mold release, silicone oil bloom, dust, incomplete post-cure, and uncontrolled delays after treatment can defeat otherwise correct printing. The selection decision should therefore assume a defined incoming surface condition. Pretreatment details belong in the separate guide to silicone surface pretreatment, not in the method comparison.
Method Selection by Silicone Product
| Silicone product or graphic | Recommended starting method | Why | Main point to validate |
|---|---|---|---|
| Keypad legends on domed keys | Pad printing | Small isolated graphics on repeated 3D features | Registration after part compression and wear under finger contact |
| Large logo on a flat silicone mat | Screen printing | Broad direct coverage on a controlled surface | Fixture height, opacity, and flex durability |
| One-color mark on a molded industrial seal | Pad printing | Local mark on an irregular molded part | Access, contamination, and adhesion after handling |
| Multi-color graphic on an accessible wristband area | Transfer printing | Composite artwork avoids several direct color strikes | Stretch, edge integrity, and carrier conformity |
| Continuous one-color graphic around a simple cylindrical part | Screen printing, subject to rotary access | Controlled wrap path can favor direct screening | Start-to-end registration and fixture concentricity |
| Detailed graphic on a broad shallow-curved consumer part | Transfer printing | Detail and color complexity favor a prepared carrier | Uniform pressure over the complete image |
| Logo across deep texture or multiple height changes | Redesign the artwork or print location | Contact is discontinuous for every method | Whether the marking should be split, moved, molded, or engraved |
A method recommendation should be rejected if it ignores the print location. “We use transfer printing for wristbands” is not enough. A front logo, a full wrap graphic, and a design crossing the mold parting line are three different jobs on the same product.
When Should You Reject Pad, Screen, or Transfer Printing?
A useful selection process does not only name the preferred method. It also states why the other routes are being removed.
Reject pad printing when
- The image area is too large for uniform transfer
- The artwork requires tight registration across several colors on a soft part
- The graphic wraps too far around the geometry
- Pad roll-off would visibly stretch critical text or symbols
Reject screen printing when
- The print face contains compound curvature, domes, or abrupt height changes
- The screen cannot maintain a controlled contact and release path
- The graphic sits inside a recess or close to an obstruction
- The part stretches or shifts during the print stroke
Reject transfer printing when
- The carrier cannot contact the full image area
- The part or assembly cannot tolerate the validated transfer window
- Texture, ribs, or sharp radius changes interrupt pressure
- Edge lift cannot be controlled under the intended flex or wash cycle
If all three methods fail the geometry or durability requirement, forcing the print process is the wrong response. Move the graphic, split it, simplify it, or evaluate a non-ink marking method. The comparison should stop before a supplier makes samples for an artwork that is structurally unprintable.
What Must Be Defined Before Requesting a Quote?
Send the same inputs to every supplier. Otherwise, the prices do not represent the same process.
- 3D model and 2D drawing showing the exact print location
- Print-face radius, texture, draft, recesses, and nearby parting lines
- Finished part dimensions and Shore A hardness measured to ASTM D2240
- Silicone grade, pigment, post-cure condition, and any mold-release history
- Vector artwork with dimensions, minimum line width, and Pantone color references
- Color count, opacity requirement, and acceptable color tolerance after cure
- Annual volume, order quantity, lot size, and expected artwork changes
- Required rub, flex, wash, chemical, UV, or aging test
- Regulatory market and whether compliance applies to the ink, printed area, or finished product
- Approved appearance sample and measurable defect limits
The supplier should return the proposed method, tooling list, pretreatment route, validation plan, one-time cost, recurring unit cost, and assumptions behind the quoted scrap rate. A unit price without those assumptions is not comparable.
Choose the Process Before Locking the Artwork
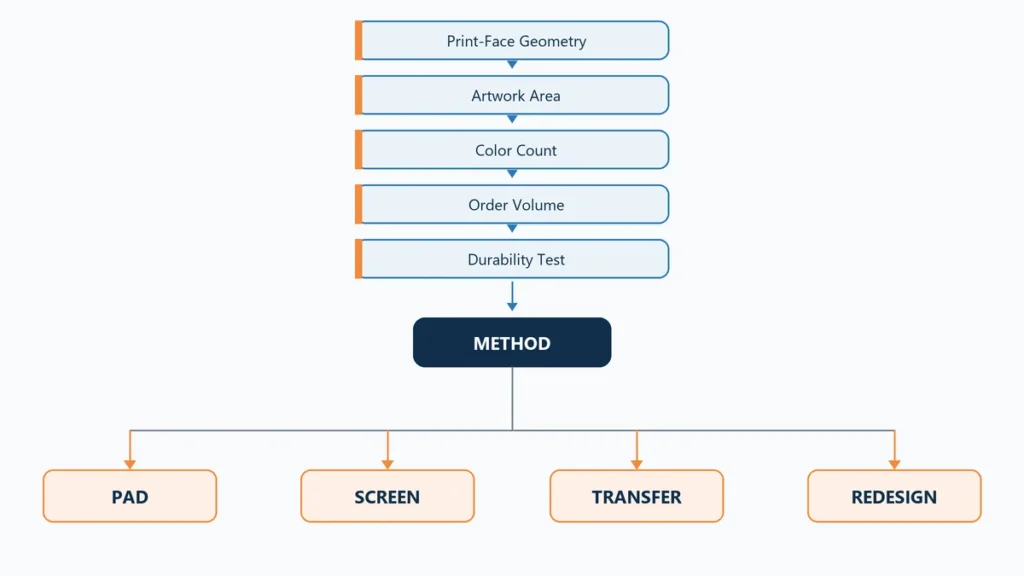
Pad printing vs screen printing vs transfer printing on silicone is mainly a geometry and artwork-architecture decision. Cost optimization comes after the method can physically reach the surface and hold the required registration.
For an initial process review, provide the print-face geometry, artwork dimensions, color count, silicone hardness, expected volume, and durability test. Without those six inputs, a method recommendation is only a preference. With them, pad, screen, and transfer printing can usually be separated before tooling rather than after a failed sample round.
References
- ASTM D3359-23, Standard Test Methods for Rating Adhesion by Tape Test — ASTM International; active edition, updated March 7, 2023
- ISO 2409:2020, Paints and varnishes — Cross-cut test — International Organization for Standardization; Edition 5, published August 2020 and marked for revision in June 2026
- ASTM D2240-15(2021), Standard Test Method for Rubber Property—Durometer Hardness — ASTM International; active edition, updated July 23, 2021
- Pantone Color Systems — Pantone; official overview of PMS and FHI color systems