Receiving a shipment of silicone products only to find defects or inconsistencies can delay your entire production line and damage customer trust.
A thorough inspection checklist helps ensure silicone product shipments meet quality, safety, and performance expectations before use or distribution.
I’ve received boxes that looked perfect outside but were full of poorly molded parts inside. That’s why I always follow a strict checklist—before signing off on any delivery.
Why Is Inspection Important for Silicone Products?
Silicone is flexible and durable, but quality issues like flashing, bubbles, or mislabeling can still occur.
Inspection ensures the products match approved samples and meet specifications in appearance, performance, and packaging.
Even minor defects can render silicone parts unusable—especially for baby, medical, or food-grade items. A simple checklist helps catch those issues early, not after they reach customers.
What You Can Catch During Inspection
- Incorrect hardness or size
- Poor molding or flashing
- Discoloration or odor
- Incorrect packaging or missing labels
- Contamination or dust inside sealed bags
Never assume quality—verify it.
What Should Be Included in a Silicone Product Inspection Checklist?
A complete checklist covers appearance, dimensions, material, labeling, packaging, and quantity.
Your checklist should include visual checks, dimensional tests, material verification, odor testing, and packaging accuracy.
I split mine into six core areas. Each category has clear criteria and pass/fail actions. This structure makes inspection faster, easier to train for, and more consistent.
Silicone Product Inspection Checklist
| Inspection Item | What to Check | Action |
|---|---|---|
| Visual Quality | Surface smoothness, no bubbles, no flashing or burns | Reject if defects are visible |
| Dimensions | Measure with calipers—check OD, ID, thickness, etc. | Tolerance per drawing (±0.2–0.5 mm) |
| Hardness | Shore A durometer test | Within specified range (e.g. 60±5) |
| Color & Odor | Match Pantone code, no strong odor | Reject if mismatch or off-smell |
| Cleanliness | No dust, oil, or contamination | Must be clean and ready to use |
| Packaging | Sealed bags, correct labels, barcode presence | Match order requirements |
| Quantity | Count cartons and random sample units | Within ordered quantity ±2% |
Use a simple pass/fail form with room for notes and photos. Keep one copy and send one back to the supplier if needed.
How Many Units Should You Inspect?
Checking every item isn’t practical for large orders—but random sampling gives a reliable quality picture.
Use AQL (Acceptable Quality Limit) sampling standards or inspect 10% of the shipment randomly, especially for high-risk applications.

I usually inspect 10% minimum—or follow ANSI Z1.4 standards when dealing with mission-critical items like medical tubing or baby products.
Suggested Sampling Sizes
| Shipment Size | Sample Units |
|---|---|
| 100 – 500 pcs | 20 – 50 |
| 500 – 1,000 pcs | 50 – 80 |
| 1,000 – 5,000 pcs | 80 – 125 |
| Over 5,000 pcs | Use AQL or third-party QC service |
More critical items = higher sampling levels. You can also inspect the first 20 pcs from each box for better distribution.
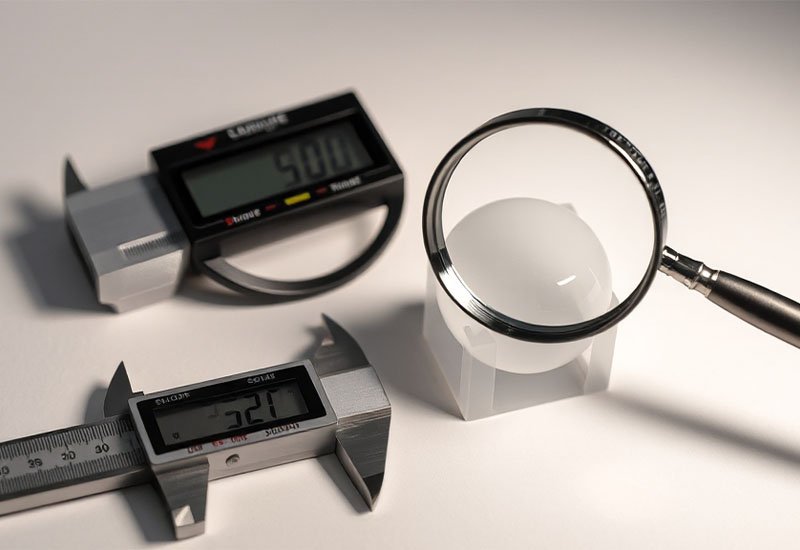
What Tools Do You Need for Silicone Product Inspection?
Manual checks only go so far. Proper tools help verify claims and document findings.
Basic tools like digital calipers, Shore A durometer, magnifier, and a reference sample can catch most issues quickly.
I keep a small QC kit on hand at every warehouse or delivery dock. It includes:
Recommended Tools
| Tool | Purpose |
|---|---|
| Digital Caliper | Check dimensions (OD, ID, length, wall) |
| Shore A Durometer | Measure material hardness |
| Color Swatch / Pantone | Verify product color match |
| Reference Sample | Compare against approved golden sample |
| Inspection Sheet | Log notes, photos, and decisions |
| Magnifying Glass | Spot micro-defects or surface issues |
Optional: UV light (for invisible contaminants) or barcode scanner (to check packaging accuracy).
How Should You Handle Non-Conforming Items?
When a product doesn’t meet your standards, document the problem and act fast.
Separate defective units, take photos, and notify your supplier immediately with inspection reports and batch numbers.
I use a color-coded bin system—red for reject, yellow for quarantine, green for passed. This keeps everyone on the same page during rush unloading.
Steps to Handle Issues
- Tag Defective Parts: Include date, issue, batch ID.
- Photograph Problems: Attach to report for clear evidence.
- Isolate the Lot: Avoid mixing with good products.
- Notify Supplier: Share findings and request replacements or credit.
- Track Incidents: Keep a record to monitor supplier performance.
Good suppliers will respond quickly. Great ones will take proactive steps to prevent future problems.
Should You Use a Third-Party Inspection Service?
If you can’t inspect in-house or have high volume, outside help may be worth it.
Third-party inspection services offer unbiased QC checks, useful for large orders or critical applications like medical or food-grade silicone.
I usually inspect myself for small orders. But for overseas production or tight timelines, I’ve used trusted inspection partners to verify before shipment.
When to Consider Outsourcing
- High-value orders ($5,000+)
- First-time supplier or new product
- Orders shipping direct to retail
- Medical, baby, or food-contact products
- Limited warehouse or QC team
Ask the inspection company to follow your checklist or create a shared SOP (standard operating procedure).
Conclusion
A consistent inspection checklist ensures your silicone product shipments meet expectations—saving time, money, and customer satisfaction.